
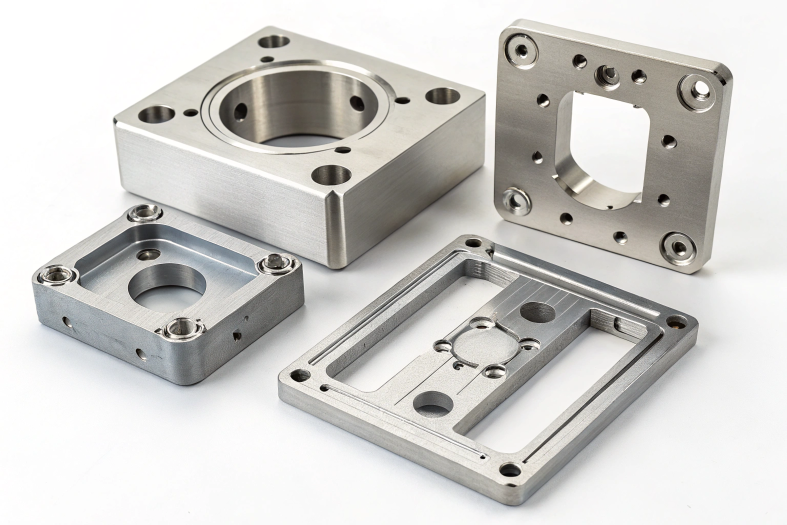
Precision and efficiency are critical in CNC machining, yet manufacturing high-quality parts can feel overwhelming without a clear roadmap. As industries demand increasingly complex components, understanding the manufacturing steps becomes essential for success. At Promachined, we simplify the process to help you achieve flawless results every time.
Direct Answer:
- Design the Part: Create a detailed 2D or 3D model using CAD software.
- Program the Toolpaths: Use CAM software to generate G-code instructions for machining.
- Prepare the Machine: Secure the workpiece, install cutting tools, and set the machine’s origin.
- Execute Machining: Run the CNC machine to shape the material using processes like milling, turning, or drilling.
- Inspect the Part: Perform quality control checks for dimensions, tolerances, and surface finish.
- Post-Processing: Apply finishing touches like deburring, anodizing, or heat treatment if required.
These steps ensure precision, efficiency, and high-quality CNC machined parts.
Design and CAD Modeling
Role of Computer-Aided Design (CAD)
The CNC machining process begins with the creation of a precise digital model using Computer-Aided Design (CAD) software. This model acts as the blueprint for all subsequent manufacturing steps. Engineers and designers rely on CAD tools to design parts that meet exact specifications while considering manufacturability.
Capabilities of CAD Software:
-
Create 2D and 3D Geometries:
- CAD software allows users to develop simple 2D sketches as well as complex 3D solid and surface models.
- Features such as extrusions, revolutions, sweeps, lofts, and Boolean operations enable detailed representation of part geometries.
-
Define Dimensions and Tolerances:
- Accurate dimensions and tolerances ensure the part meets its functional requirements.
- Geometric Dimensioning and Tolerancing (GD&T) tools within CAD software further enhance precision by defining critical functional requirements.
-
Visualize and Analyze Designs:
- CAD models can be rotated, zoomed, and sectioned to provide a comprehensive view of the design.
- Some software includes basic simulation tools for evaluating stress, strain, or other factors impacting the design's performance.
-
Generate Technical Drawings:
- CAD software can automatically create 2D technical drawings from 3D models, including orthographic projections, sectional views, and detailed annotations.
- These drawings are essential for communicating design specifications to manufacturers.
-
Facilitate Data Exchange:
- CAD files can be exported in various formats (e.g., STEP, IGES, STL, DXF) for compatibility with other systems like CAM software.
Commonly Used CAD Software:
- SolidWorks: Known for its parametric modeling and user-friendly interface, it is widely used in mechanical design.
- AutoCAD: A versatile tool for 2D drafting and basic 3D modeling, often used for layouts and schematics.
- Fusion 360: Combines CAD, CAM, and CAE capabilities into a cloud-based platform, making it ideal for collaborative projects.
- CATIA: Preferred in industries like aerospace and automotive for complex surface modeling and large assemblies.
- NX (formerly Unigraphics): Offers advanced functionalities for product design, simulation, and manufacturing.
Design for Manufacturing (DFM) Considerations
Design for Manufacturing (DFM) is an essential step that ensures designs are optimized for efficient and cost-effective production. By applying DFM principles during the CAD modeling phase, manufacturers can streamline production, minimize costs, and improve overall quality.
Key DFM Principles for CNC Machining:
-
Avoid Sharp Internal Corners:
- Sharp corners can create stress concentrations and are challenging to machine accurately.
- Introducing fillets or radii smoothens corners, improving part strength and reducing tool wear.
-
Maintain Consistent Wall Thickness:
- Variations in wall thickness may cause warping, distortion, or uneven cooling during machining.
- Uniform walls enhance dimensional stability and reduce material waste.
-
Use Standard Tooling Sizes:
- Design features compatible with standard tool sizes to minimize the need for custom tools, which are costly and time-intensive.
-
Minimize Deep Cavities and Narrow Slots:
- Deep cavities and narrow slots are challenging to machine due to limited tool access and chip evacuation issues.
- Simplify these features for better machinability.
-
Consider Workholding:
- Ensure the design accommodates secure clamping or fixturing without interfering with machining operations.
-
Specify Appropriate Tolerances and Surface Finishes:
- Overly tight tolerances and fine surface finishes increase costs and machining time.
- Define tolerances that align with functional requirements.
-
Account for Parting Lines and Draft Angles:
- For cast or molded parts that will undergo CNC machining, include draft angles and proper parting lines to ease mold release and subsequent machining.
Benefits of DFM in CAD:
- Cost Reduction: Efficient designs reduce material waste and simplify machining operations.
- Improved Quality: DFM ensures parts are designed with manufacturing capabilities in mind, minimizing defects.
- Streamlined Production: Optimized designs reduce production time and enhance throughput.
Integrating CAD and DFM: A Practical Example
Consider a precision component with internal cavities.
- Using CAD software like SolidWorks, the designer can create a 3D model with filleted corners to facilitate machining and reduce stress concentrations.
- Applying DFM principles, the designer specifies consistent wall thickness and selects hole sizes compatible with standard drill bits, ensuring smooth production.
CAM Programming and Toolpath Generation
Introduction to Computer-Aided Manufacturing (CAM)
After completing the design phase and finalizing the CAD model, the focus shifts to Computer-Aided Manufacturing (CAM). CAM software bridges the gap between digital design and physical machining by converting the CAD model into G-code, the machine-readable instructions that control CNC operations.
Key Functions of CAM Software:
-
Importing CAD Models:
- CAM software supports various file formats (e.g., STEP, IGES, STL, DXF) to seamlessly integrate CAD designs.
-
Defining Machining Operations:
- Users can define machining processes such as milling, turning, drilling, tapping, and contouring, specifying the sequence for optimal efficiency.
-
Tool Selection and Management:
- CAM software provides libraries of cutting tools, enabling selection based on material, geometry, and required surface finish.
-
Toolpath Generation:
- This core function calculates the precise paths the cutting tool must follow to remove material and create the desired shape.
-
Simulation and Verification:
- Simulations allow operators to visualize the machining process, identify potential collisions or errors, and make adjustments before machining begins.
-
G-code Generation:
- The final output is G-code, a numerical control programming language that specifies the machine's movements, speeds, and functions.
Popular CAM Software:
- Mastercam: Renowned for its versatility in milling, turning, wire EDM, and routing.
- PowerMill: Specializes in complex 3D machining, ideal for molds, dies, and aerospace components.
- GibbsCAM: Offers a user-friendly interface and powerful features for various applications.
- Esprit: A comprehensive CAM solution for a wide range of CNC tools and programming needs.
- Fusion 360: An integrated CAD/CAM platform that streamlines the workflow between design and manufacturing.
Toolpath Generation
Toolpath generation is at the heart of the CAM process. It involves making critical decisions that impact machining quality, efficiency, and costs.
Key Aspects of Toolpath Generation:
-
Tool Selection:
- The choice of cutting tools depends on factors like:
- Material: Harder materials may require carbide or ceramic tools, while softer materials might use high-speed steel (HSS) tools.
- Geometry: Tools like end mills, drills, or lathe tools are chosen based on the feature being machined.
- Coating: Coatings such as TiN or TiAlN enhance tool life, reduce friction, and improve performance.
- The choice of cutting tools depends on factors like:
-
Cutting Parameters:
- These parameters directly affect machining outcomes:
- Feed Rate: The speed at which the tool moves across the workpiece.
- Spindle Speed: The rotational speed of the cutting tool.
- Depth of Cut: The amount of material removed per pass.
- Cutting Speed: The relative speed between the tool and the material.
- These values are often determined using tool manufacturer guidelines or empirical testing.
- These parameters directly affect machining outcomes:
-
Machining Strategies:
- Different strategies are applied depending on the requirements:
- Roughing: Rapid material removal to achieve a near-final shape.
- Finishing: Precision cutting to achieve final dimensions and surface finish.
- Contouring: Following the part's profile for precise shape definition.
- Pocketing: Removing material from enclosed areas to create cavities.
- Drilling and Tapping: Creating holes and threads with high accuracy.
- Different strategies are applied depending on the requirements:
-
Toolpath Patterns:
- Various patterns optimize machining for specific geometries:
- Zig-Zag: Back-and-forth movement, ideal for large areas.
- Contour: Follows the shape of the part.
- Spiral: Continuous motion for circular features.
- Trochoidal: Combines circular and linear motion, suitable for high-speed machining.
- Various patterns optimize machining for specific geometries:
Practical Example of Toolpath Generation
Consider machining a complex steel component:
- Tool Selection:
- A carbide end mill is chosen for roughing, a ball-nose cutter for finishing contours, and a drill bit for hole creation.
- Cutting Parameters:
- Spindle speed is set at 10,000 RPM, feed rate at 1,000 mm/min, and depth of cut at 2 mm for roughing.
- Machining Strategies:
- Adaptive roughing paths remove the bulk material efficiently, followed by finishing passes to achieve smooth surfaces and precise dimensions.
CNC Machine Setup and Preparation
Machine Setup Process
Proper CNC machine setup is critical for ensuring accurate, efficient, and safe machining operations. It involves the following key steps:
1. Workpiece Clamping (Workholding)
Securing the workpiece rigidly to the machine table prevents movement or vibration during machining, ensuring precision and avoiding damage.
-
Methods of Workholding:
- Vises: General-purpose clamps with adjustable jaws, suitable for a wide range of parts.
- Fixtures: Custom-designed setups for specific parts, ideal for high-volume or complex machining.
- Chucks: Used for cylindrical parts during turning operations; examples include jaw chucks, collet chucks, and magnetic chucks.
- Clamps: Tools like toe clamps, strap clamps, or edge clamps are used to secure parts directly to the machine table.
- Vacuum Fixtures: Employ vacuum pressure to hold flat parts securely without mechanical interference.
-
Considerations for Workholding:
- Ensure the clamping method provides enough force to prevent movement without deforming the workpiece.
- Design workholding solutions that allow tool access to all required machining areas.
2. Tool Installation and Calibration (Tooling)
Installing and calibrating cutting tools accurately ensures they perform their intended operations with precision.
-
Steps for Tool Installation:
- Tool Selection: Choose the appropriate tool type, such as end mills, drills, taps, or inserts, based on the operation and material.
- Tool Holding: Secure the tool using collets, end mill holders, or shell mill holders to minimize vibration and movement.
- Tool Presetting: Use external presetters to measure tool length and diameter before installation, reducing machine setup time.
- Tool Offsetting (Calibration): Measure the tool’s exact length and diameter after installation and input these offsets into the machine’s control system.
-
Best Practices:
- Inspect tools for wear or damage before use.
- Use torque wrenches to secure tool holders to avoid slippage.
3. Setting Machine Origin (Workpiece Coordinate System)
Establishing the Workpiece Coordinate System (WCS) ensures that the machine’s movements align perfectly with the design specifications.
-
Steps for Setting the WCS:
- Reference Point Location: Select a corner, edge, or feature on the workpiece as the origin point.
- Edge Finders or Probes: Use these tools to precisely locate the reference point.
- Input Coordinates: Enter the origin’s coordinates into the machine’s control system.
-
Key Considerations:
- Verify the origin by performing a dry run or test cut.
- Recheck coordinates if the workpiece is repositioned during machining.
Proper setup minimizes errors, reduces scrap, and ensures consistent and accurate machining results.
Machining Process
Execution of Machining
Once the machine is set up, it executes the G-code instructions generated during the CAM programming phase. These instructions guide the cutting tool’s movements relative to the workpiece, performing various operations.
Common CNC Machining Operations:
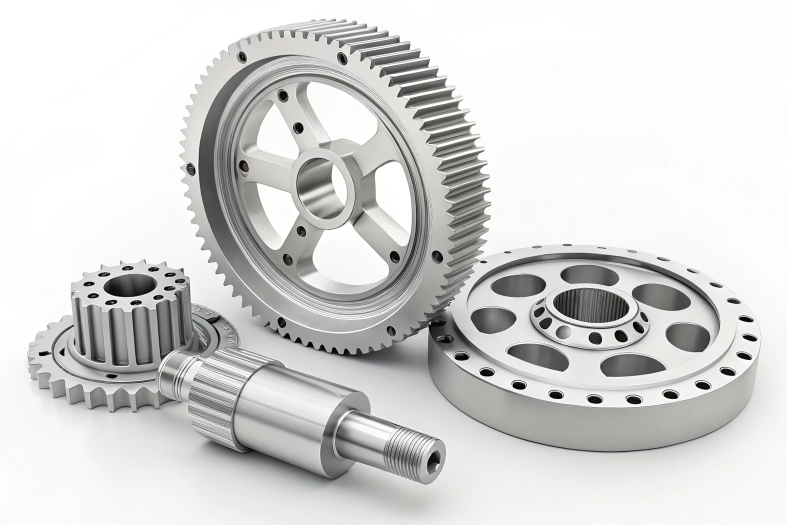
- Milling:
- Removes material using a rotating tool moving across multiple axes.
- Ideal for creating complex geometries, pockets, and flat surfaces.
- Turning:
- Rotates the workpiece while a stationary tool removes material.
- Suitable for producing cylindrical shapes like shafts and bushings.
- Drilling:
- Uses a rotating drill bit to create precise holes.
- Tapping:
- Creates internal threads in drilled holes using a tap.
- Boring:
- Enlarges an existing hole to achieve precise dimensions.
- Reaming:
- Improves the surface finish and dimensional accuracy of holes.
Coolants and Lubrication
Coolants and lubricants play an essential role in ensuring machining quality and tool performance.
Functions of Coolants and Lubricants:
-
Heat Reduction:
- Cutting operations generate heat that can lead to tool wear and material deformation.
- Coolants dissipate this heat, maintaining tool and workpiece integrity.
-
Prolonging Tool Life:
- Lubrication minimizes friction between the cutting tool and the material, reducing wear and extending tool lifespan.
-
Chip Evacuation:
- Helps flush chips away from the cutting zone, preventing interference and improving surface quality.
-
Enhancing Surface Finish:
- Reduces built-up edge (BUE) on tools, ensuring a smoother, more accurate finish.
Types of Coolants and Lubricants:
- Cutting Fluids (Coolants):
- Water-based fluids that provide both cooling and lubrication.
- Commonly used for high-speed machining.
- Cutting Oils (Lubricants):
- Oil-based fluids offering superior lubrication for heavy-duty operations.
- Synthetic Coolants:
- Chemically formulated for specific performance characteristics, such as enhanced cooling or corrosion resistance.
Best Practices for Coolants and Lubrication:
- Monitor coolant levels and replace them regularly to maintain performance.
- Use high-pressure coolant systems for operations like deep-hole drilling or high-speed cutting.
Practical Example:
For machining an aluminum component:
- Clamping: A vise is used to secure the workpiece for milling operations.
- Tooling: An end mill with TiN coating is selected for high-speed roughing, followed by a ball-nose cutter for finishing.
- Coolant: Water-soluble cutting fluid is applied to reduce heat and improve surface quality.
Quality Control and Inspection
Importance of Quality Control
Quality control is a vital component of the CNC machining process, ensuring that the final product meets design specifications, dimensional tolerances, and surface finish requirements. Implementing thorough quality control minimizes defects, reduces waste, and ensures customer satisfaction.
Key Inspection Methods:
-
Dimensional Checks:
- Purpose: Ensures that all dimensions conform to the specified tolerances in the design.
- Tools Used:
- Calipers: Versatile instruments for measuring external, internal, and depth dimensions. Vernier calipers offer higher precision compared to dial or digital variants.
- Micrometers: Precision instruments designed for highly accurate measurements. Variants include:
- Outside Micrometers: For measuring external dimensions.
- Inside Micrometers: For measuring internal dimensions.
- Depth Micrometers: For measuring depths of features like holes or slots.
- Coordinate Measuring Machines (CMMs): Advanced devices using probes to measure complex geometries with high accuracy. Often employed for critical dimensions and tolerances.
- Height Gauges: Used to measure vertical distances from a reference surface.
- Gauge Blocks: Precision-ground blocks for calibrating instruments and verifying dimensions.
-
Surface Finish Inspections:
- Purpose: Assesses the smoothness and texture of machined surfaces.
- Techniques:
- Visual Inspection: Detects visible defects like scratches or tool marks.
- Surface Roughness Testers (Profilometers): Quantifies roughness parameters (e.g., Ra, Rz) to evaluate surface texture.
- Standard Comparisons: Compares machined surfaces with reference standards having known roughness values.
-
Non-Destructive Testing (NDT):
- Purpose: Evaluates the material's integrity without causing damage.
- Methods:
- Visual Testing (VT): Basic inspection for surface defects.
- Dye Penetrant Inspection (DPI): Highlights surface-breaking defects using penetrant fluids and developers.
- Magnetic Particle Inspection (MPI): Detects surface and near-surface defects in ferromagnetic materials.
- Ultrasonic Testing (UT): Uses high-frequency sound waves to identify internal flaws like voids or cracks.
- Radiographic Testing (RT): Employs X-rays or gamma rays to inspect internal structures for defects.
A robust quality control process ensures that machined parts meet functional, safety, and aesthetic requirements, reducing rework and enhancing reliability.
Post-Processing
Additional Operations
After machining, certain parts may require post-processing to meet specific functional or aesthetic requirements. These operations enhance the part's performance, durability, or appearance.
Common Post-Processing Operations:
-
Deburring:
- Purpose: Removes sharp edges or burrs left on the workpiece after machining.
- Techniques:
- Manual Deburring: Uses tools like files, abrasive stones, or brushes.
- Mechanical Deburring: Employs tumbling, vibratory finishing, or brushing machines.
- Electrochemical Deburring (ECD): Precision deburring method for hard-to-reach areas using electrolytic processes.
-
Surface Treatments:
- Purpose: Enhances surface properties like corrosion resistance, wear resistance, or aesthetics.
- Methods:
- Anodizing: Creates a durable oxide layer on aluminum parts for protection and aesthetics.
- Painting: Applies a protective or decorative coating to the surface.
- Powder Coating: Deposits a dry powder coating, which is then cured by heat to form a tough finish.
- Plating:
- Electroplating: Deposits a metal layer using an electric current.
- Electroless Plating: Deposits a metal layer through chemical reactions, providing uniform coverage.
- Passivation: Chemically treats stainless steel to enhance corrosion resistance.
-
Heat Treatments:
- Purpose: Modifies the material’s physical and mechanical properties, such as hardness, strength, or ductility.
- Processes:
- Hardening: Increases hardness by heating and quenching the material.
- Tempering: Reduces brittleness of hardened steel by reheating to a lower temperature.
- Annealing: Relieves internal stresses and improves machinability by softening the material.
- Case Hardening: Hardens the surface while maintaining a tough, ductile core.
Practical Example:
For a precision-machined aerospace component:
- Deburring: A vibratory machine smooths edges to ensure safety and functionality.
- Surface Treatment: Anodizing enhances corrosion resistance and provides a sleek finish.
- Heat Treatment: Tempering improves toughness while retaining hardness.
Common Challenges in CNC Machining Steps
Despite its precision and automation, CNC machining comes with its own set of challenges. Recognizing and addressing these issues is critical for maintaining consistent quality, minimizing downtime, and optimizing efficiency.
Key Challenges:
-
Material Defects:
- Impact: Inhomogeneities, inclusions, voids, or other defects in raw materials can lead to uneven cutting, tool breakage, poor surface finish, and dimensional inaccuracies.
- Solutions:
- Source high-quality, certified materials.
- Conduct pre-machining inspections like ultrasonic or radiographic testing.
-
Tool Wear:
- Impact: Friction and heat during machining cause cutting tools to wear out over time, resulting in reduced cutting efficiency, poor surface finish, and dimensional errors.
- Solutions:
- Regularly inspect and replace tools.
- Use appropriate cutting parameters to extend tool life.
- Invest in high-quality, coated tools for demanding materials.
-
Programming Errors:
- Impact: Mistakes in G-code can result in tool collisions, incorrect toolpaths, and damage to the workpiece or machine.
- Solutions:
- Verify programs through simulation before machining.
- Train programmers to debug G-code and use advanced CAM software.
-
Improper Machine Setup:
- Impact: Incorrect workholding, tool installation, or origin setting can cause dimensional errors, misaligned cuts, or machine damage.
- Solutions:
- Adhere to standardized setup procedures.
- Train operators thoroughly in setup techniques.
- Perform test runs or dry cuts to validate the setup.
-
Chip Control:
- Impact: Poor chip evacuation can interfere with the cutting process, cause tool breakage, and degrade surface finish.
- Solutions:
- Optimize tool geometry and cutting parameters for efficient chip removal.
- Use high-pressure coolant systems to flush chips away from the cutting zone.
-
Vibrations:
- Impact: Vibrations during machining can cause chatter, reduce tool life, and impair surface quality.
- Solutions:
- Ensure rigid workholding and machine stability.
- Adjust cutting parameters to minimize vibrations.
- Maintain and calibrate the machine to reduce mechanical play.
-
Thermal Expansion:
- Impact: Heat generated during machining can cause expansion of the workpiece or machine components, leading to dimensional inaccuracies.
- Solutions:
- Use coolants to regulate temperatures.
- Optimize cutting speeds and feeds to minimize heat generation.
By addressing these challenges proactively, manufacturers can enhance production efficiency, reduce waste, and improve product quality.
How to Optimize CNC Machining Workflow
Streamlining the CNC machining workflow is essential for boosting productivity, reducing costs, and delivering high-quality products.
Strategies for Optimization:
-
Invest in Preventive Maintenance:
- Purpose: Prevent machine breakdowns and ensure consistent performance.
- Actions:
- Regularly inspect and service critical components like spindles, tool changers, and coolant systems.
- Replace worn parts before failure using predictive maintenance tools.
-
Train Operators Effectively:
- Purpose: Ensure operators can handle complex programming, troubleshooting, and machine operation.
- Focus Areas:
- G-code interpretation and CAM software use.
- Best practices for tool setup and maintenance.
- Problem-solving for common machining issues.
-
Leverage Advanced CAM Software:
- Purpose: Improve toolpath efficiency and reduce errors.
- Features:
- Adaptive toolpath strategies for faster, smoother cuts.
- Simulation tools to identify and fix potential collisions or toolpath issues.
-
Optimize Machining Parameters:
- Purpose: Achieve maximum efficiency and quality for specific materials and tools.
- Actions:
- Regularly review and refine feed rates, spindle speeds, and depth of cuts.
- Collaborate with tooling suppliers to stay updated on cutting-edge technology.
-
Implement Lean Manufacturing Principles:
- Purpose: Eliminate waste and improve workflow efficiency.
- Methods:
- Apply 5S for workplace organization.
- Use Value Stream Mapping to identify bottlenecks.
- Conduct continuous improvement (Kaizen) initiatives.
-
Use Automation:
- Purpose: Reduce manual labor and increase productivity.
- Applications:
- Automate tasks like part loading/unloading, tool changes, and inspections using robotic systems.
- Implement pallet systems for continuous machining.
-
Enhance Workholding and Fixturing:
- Purpose: Secure the workpiece firmly to minimize vibrations and improve accuracy.
- Solutions:
- Use custom fixtures for complex geometries.
- Incorporate modular workholding systems for flexibility.
-
Implement Tool Management Systems:
- Purpose: Maintain an organized inventory of tools and monitor their usage.
- Actions:
- Track tool life and usage patterns to optimize replacement schedules.
- Ensure the right tools are readily available for each job.
-
Use Data Analytics:
- Purpose: Gain insights into machining performance and identify areas for improvement.
- Applications:
- Collect data on cycle times, tool wear, and part quality.
- Use analytics software to detect trends and predict issues.
Practical Example:
For a precision batch production process:
- Maintenance: Predictive monitoring identified a spindle issue, preventing unplanned downtime.
- CAM Optimization: Adaptive toolpaths reduced cycle time by 20%.
- Automation: Robotic part handling improved throughput by 30%.
Conclusion
CNC machining, to me, is more than just a technical process—it’s like an art form where precision meets creativity. Every step, from sketching out designs in CAD to that final inspection, plays its part in crafting something functional and reliable. And sure, it has its fair share of challenges—defective materials, tools wearing out, or the occasional programming hiccup—but honestly, that’s where the fun is: solving those problems and getting better each time.
You know, the coolest thing about CNC machining is how it’s all about continuous improvement. Whether it’s fine-tuning the workflow, upgrading tools, or just figuring out a smarter way to get things done, there’s always room to grow. It’s a bit like life that way, right? A constant work in progress.
If you’re diving into CNC machining—whether you’re just starting out or have been at it for years—don’t stress over the challenges. They’re just stepping stones to leveling up. And hey, if you’re looking for someone to help bring your ideas to life, why not drop by my website, www.promachined.com? That’s where I share how I can help with precision CNC machining (and maybe a story or two about what I’ve learned along the way).
Anyway, thanks for hanging out with me here. If you’ve got questions or just want to chat about CNC, I’m always around. Let’s build something great together!
FAQ:
What Is the First Step in CNC Machining?
The first step in CNC machining is designing the part using Computer-Aided Design (CAD) software. This involves creating a detailed 2D or 3D digital model that serves as the blueprint for manufacturing. The CAD model defines the part’s geometry, dimensions, and tolerances, ensuring accuracy and compatibility with the CNC machine. Once the design is complete, the model is transferred to CAM software for toolpath generation and G-code programming.
What Quality Control Methods Are Used in CNC Machining?
Quality control in CNC machining spans the entire production process, from raw material inspection to final product evaluation, covering several critical stages:
-
Dimensional Inspection:
- Precision measuring tools such as calipers, micrometers, and Coordinate Measuring Machines (CMM) are used to verify part dimensions and ensure compliance with the design's tolerance requirements.
-
Surface Finish Evaluation:
- Surface roughness is assessed using visual inspection and profilometers to meet both functional and aesthetic demands of the part.
-
Non-Destructive Testing (NDT):
- Advanced techniques like ultrasonic testing and magnetic particle inspection detect internal or surface defects, ensuring the reliability of the part.
-
Process Control and Preventive Maintenance:
- Cutting parameters, tool conditions, and machine performance are monitored throughout production to minimize errors.
- Regular preventive maintenance reduces machine downtime and ensures consistent machining accuracy.
By integrating these methods with first article inspections, in-process inspections, and final inspections, CNC machining achieves high standards of quality, ensuring the final product meets stringent requirements.
What Are the Steps Involved in CNC Part Programming?
CNC part programming involves the following steps:
- Designing the Part: Create a detailed CAD model of the part.
- Converting CAD to CAM: Use CAM software to generate toolpaths and G-code instructions.
- Selecting Tools and Parameters: Define cutting tools, feed rates, spindle speeds, and depths of cut.
- Simulating the Program: Verify the program in CAM software to detect errors.
- Transferring the Program: Upload the G-code to the CNC machine for execution.
How Are CNC Parts Made?
CNC parts are made through these steps:
- Design: Create a CAD model of the part.
- Programming: Generate G-code using CAM software.
- Setup: Secure the workpiece and tools, and set the machine's origin.
- Machining: Execute the program to shape the material into the desired part.
- Inspection: Perform quality checks to ensure the part meets specifications.
What Is the Manufacturing Process of Machining?
The manufacturing process of machining typically involves:
- Material Selection: Choose the appropriate raw material.
- Design and Programming: Create a CAD model and convert it to G-code.
- Machine Setup: Prepare the CNC machine, tools, and workpiece.
- Cutting Operations: Use machining processes like milling, turning, drilling, or grinding to shape the part.
- Quality Control: Inspect dimensions, surface finish, and tolerances.
How Do You Manufacture a Product Using CNC Machines?
To manufacture a product using CNC machines:
- Create a CAD Model: Design the product digitally with precise dimensions.
- Generate CNC Code: Use CAM software to create G-code for machining.
- Prepare the Machine: Install tools, clamp the workpiece, and set the machine origin.
- Run the Program: Execute the G-code to machine the product.
- Inspect the Product: Verify that the finished product meets all specifications.
